Adding, deleting and managing email accounts with CPanel is quick and easy. In this guide we will provide step by step instructions on how to access CPanel (the management system that controls your hosting account) and provide advice and guidance on adding a new email account. Once you have added a new email account you will see the ease with which you can manage your email and the tools available to you. We will also touch on email forwarders in this guide to help you understand the difference between an email account and an email forwarder.
1. Accessing Cpanel
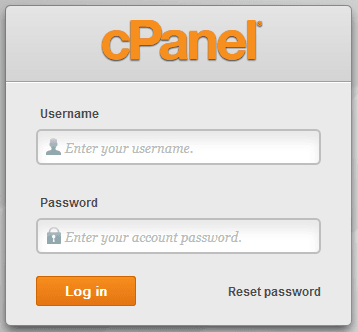
To manage email accounts, you need to log into your CPanel account. You can access your CPanel account by going to your website and then adding /cpanel to the end of the web address (i.e. www.mywebsite.com.au/cpanel). Once you enter this address into your web browser, you will be presented with the login screen below.
Your username and password will have been supplied to you in your welcome email when you commenced hosting. If you do not have this information, simply request it be resent by contacting Oley Media via http://clients.oleyhosting.com/
2. Accessing Email Account Management
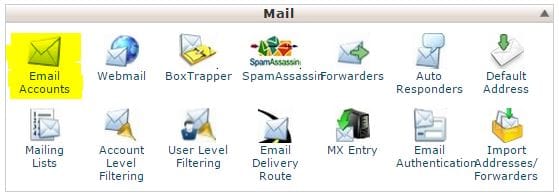
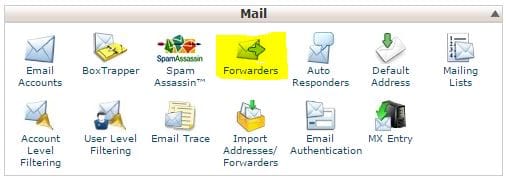
Once you have logged into CPanel, you need to find the section labelled “Mail” which has all the email functions required to manage email. Under “Mail” is an icon labelled “Email Accounts” – This is where we add, delete and modify email settings including the email quota, email password and also access the email configuration settings page.
3. Creating an Email Account
Creating an email account is very simple – the only requirements are that you know what the email address you want is going to be, what the password should be and how much quota from your hosting account you want allocated to the email account. You can allocate an unlimited quota however, you may want to restrict some email accounts to smaller quotas.
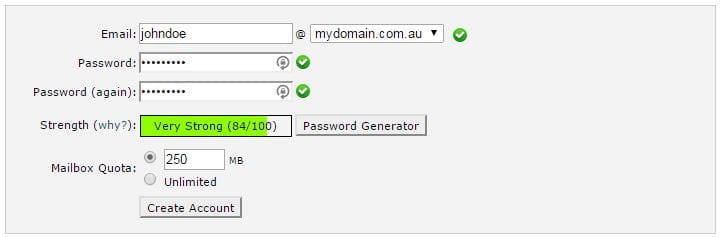
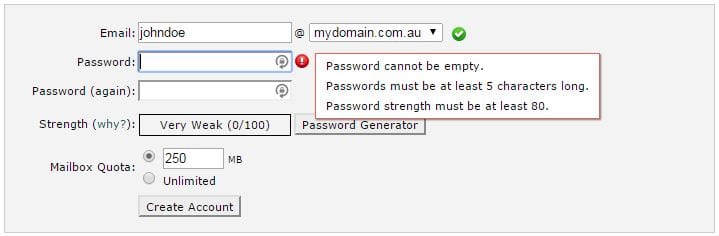
3.1. Creating a Strong Password
You must create a strong password to ensure the security of the system is maintained.
4. Managing your Email Account
Once you have created an email account, you can come back at any time to manage the account and change the settings that you entered at account creation. Settings that can be modified include the password, the account quota or you can delete the email account altogether.
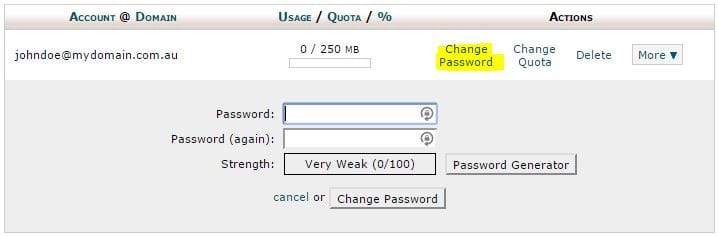
4.1. Changing your Email Password
You can change your password at any time.
4.2. Changing your Email Quota
You can change your quota at any time.

5. Configuring your Email Account in Outlook, Thunderbird, etc.
We have created specific guides on how to create email accounts for each of these programs which can be accessed via these following links however, all the settings required to configure your email account can be found under “Configure Email Client”. You can also access your email from an internet browser anywhere in the world by clicking “Access Webmail” or simply going to your website and adding /webmail to the end (i.e. www.mywebsite.com.au/webmail)

If you have trouble with any of these steps, reach out and let us know via our support portal at http://clients.oleyhosting.com/
6. Email Forwarders
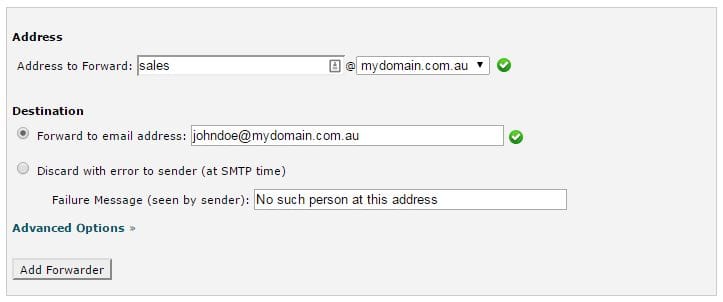
Email forwarders are different to Email Accounts in that they don’t store emails, they simply forward them onto another email account. For example, if you want to setup a [email protected] email account but want everyone to get a copy, simply create a forwarder for each email account that you want to receive it.
NOTE: You can forward a single email address to as many accounts as you like (even accounts on another server i.e. gmail accounts)
6.1 Accessing Email Forwarders
6.2 Email Forwarder Setup